Hello!
Ask me any question about Lympik.
Please be as specific as possible so I can help you better.
Set up Wi-Fi
To view recordings from your Oculus device in the web app or to perform updates, the device must be connected to the internet. This connection is established via your smartphone.
When setting up the device for the first time, make sure your Wi-Fi network or smartphone hotspot is turned on. This allows the Oculus device to connect to the desired network, complete setup, and begin normal operation.
After enabling your hotspot, wait a few seconds. Then turn on your Oculus tracker by pressing and holding the button for 1–2 seconds. The device will begin blinking slowly in white.
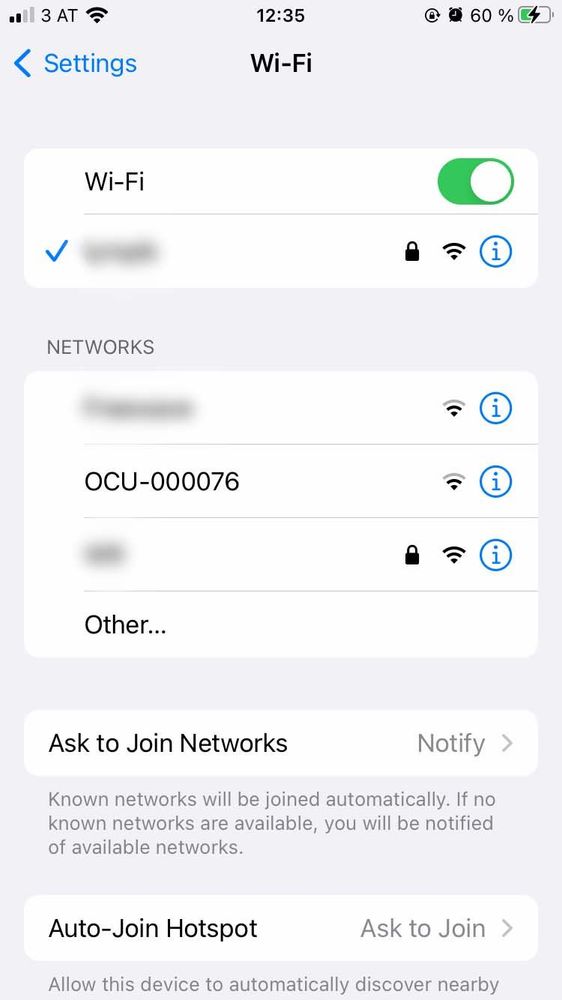
Next, press the button briefly to confirm that your desired network is available. The device will then start blinking yellow. A Wi-Fi network with the Oculus device’s serial number will appear in your smartphone’s Wi-Fi settings.
Select the network with the OCULUS device serial number to begin configuration.
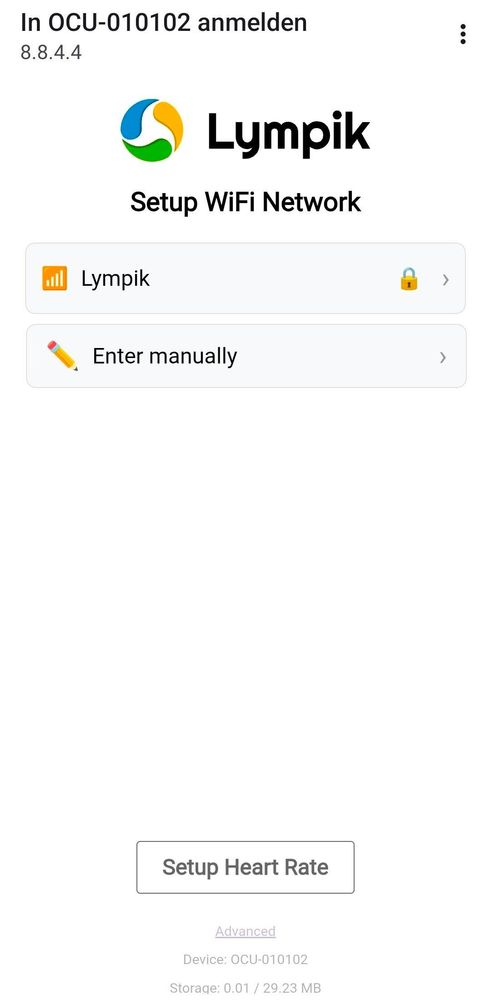
After selecting your Oculus device’s serial number, a setup window will appear where you can enter your Wi-Fi details. You can either choose a network from the list and enter the password (if your Wi-Fi or hotspot is already active), or manually enter the network credentials (only one network is required). Then press Save.
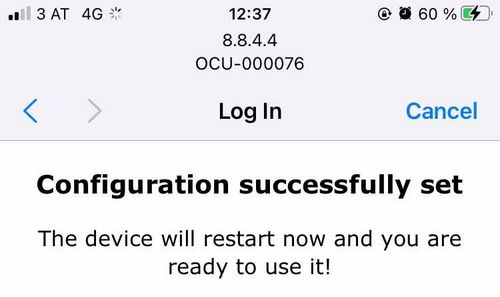
Your Oculus device will perform a Wi-Fi connection test after the setup is complete. Make sure your hotspot remains enabled during this process. If it has turned off, switch it on again, especially on iPhones, where hotspots may disconnect automatically. The device will attempt to reconnect to verify that the configuration was completed successfully.
This step only needs to be completed once per Oculus device as long as you continue using the same Wi-Fi network or smartphone hotspot to upload your data. If you switch to a different network, simply repeat this process.
To enter the Wi-Fi configuration again, please press and hold the power button until your device flashes yellow. The Wi-Fi network with the Oculus device’s serial number will then appear in your smartphone’s Wi-Fi settings and you can change the Wi-Fi network or hotspot.
Note: The default setting on some smartphones is that the Hot-Spot should switch off automatically after a certain time if no devices are connected. Your Oculus tracker only needs an internet connection to transfer data or for updates. During recording, Oculus is not connected to the wifi, which could cause the Wi-Fi on your smartphone to switch off.
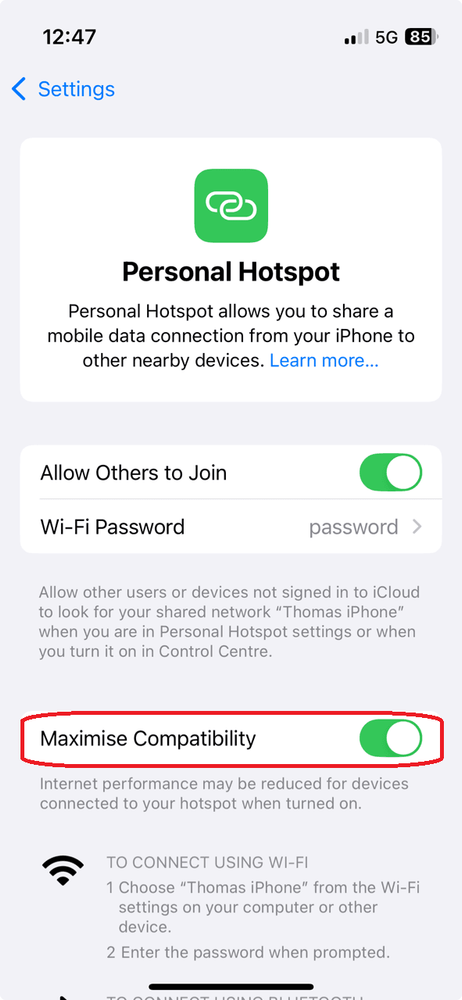
If you are using an IPhone Hotspot, please make sure to activate "Maximise Compatibility" in your Hot-Spot settings: