
Hello!
Ask me any question about Lympik.
Please be as specific as possible so I can help you better.
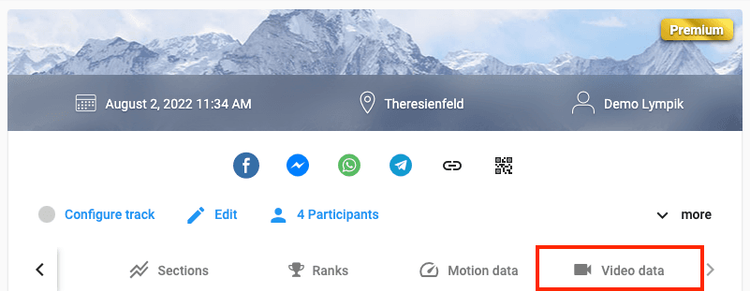
Video upload
To start the video analysis, navigate to the respective activity in the app and click on "Video data" (you may have to scroll to the right until you find the ‘video-data’ section):
To upload your videos to the app, first click on "Add video" - here you can now drag and drop them into the window. Alternatively, you can click on "Choose file" and search for the videos on your PC. Then click on "Open/Upload".
When using the video analysis in combination with the timing, your videos get automatically allocated to the correct athlete if he/she used a personalized NFC-chip.
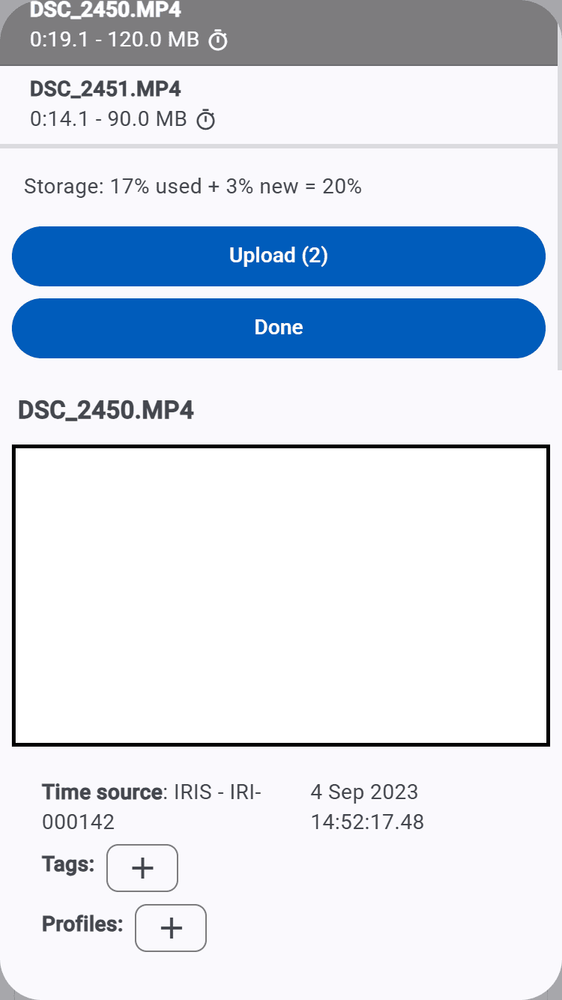
You can also manually assign a video to an athlete as well as add a tag to each video (only possible when uploading the videos to the cloud storage). This is useful if you have a large number of videos. You can use those tags to filter the videos if desired.
After you have selected the respective videos, a window opens where all the added videos are listed. You can now decide if you want to upload the videos into the cloud storage by clicking on "upload" or if you want to add the videos only for analyzing them right away by clicking on "done":
The window closes again and now you can see all the videos you just uploaded. They are available in different views:
- grouped by lap
- grouped by video
You can display them in tiles or in a list. If you want to delete a video, you can only do this in the list view grouped by video.
Now press on "Analyze".